Whilst Photoshop is about manipulating pixels (photographs, basically), Illustrator is about creating and editing vectors — shapes like logos and diagrams. A vector diagram has infinite resolution because the shapes are mathematically defined, although you do not see the mathermatics.
▷ If you do not already have the Lato font set installed on your computer, then load this from the Adobe Creative Cloud. How to do this is explained in InDesign Lesson 2.
▷ Open Illustrator.
▷ Apple: go and make sure that General is set to “mm”.
▷ PC: go and make sure that General is set to “mm”.
▷ Create a new A4 landscape document in Illustrator by going (this of course you already now know), then click on Print in the new document window top bar, click A4, and click on the landscape icon under “Orientation” on the right. Click Create.
▷ So that we are in the same space, go . Note that the tools, panels etc. are essentially the same as in InDesign.
1. Creating a shape
Creating and manipulating shapes is what Illustrator is really good at.
Creating a circle and a rectangle
▷ Press D to set the default white fill and black contour colours.
▷ With the Ellipse Tool L (hold down the Rectangle Tool until you see the Ellipse Tool), create an ellipse with both a Width and Height of 100mm (which is a circle). If you cannot see the width and height dimensions, click Transform from the top bar.
▷ Then create a rectangle 50mm × 100mm.
▷ Arrange approximately as shown in the diagram here — you might want to select both objects and use the Horizontal Align Centre button at the top. (if you do not see the Horizontal Align Centre icon then first click “Aligh” in the Control Panel).
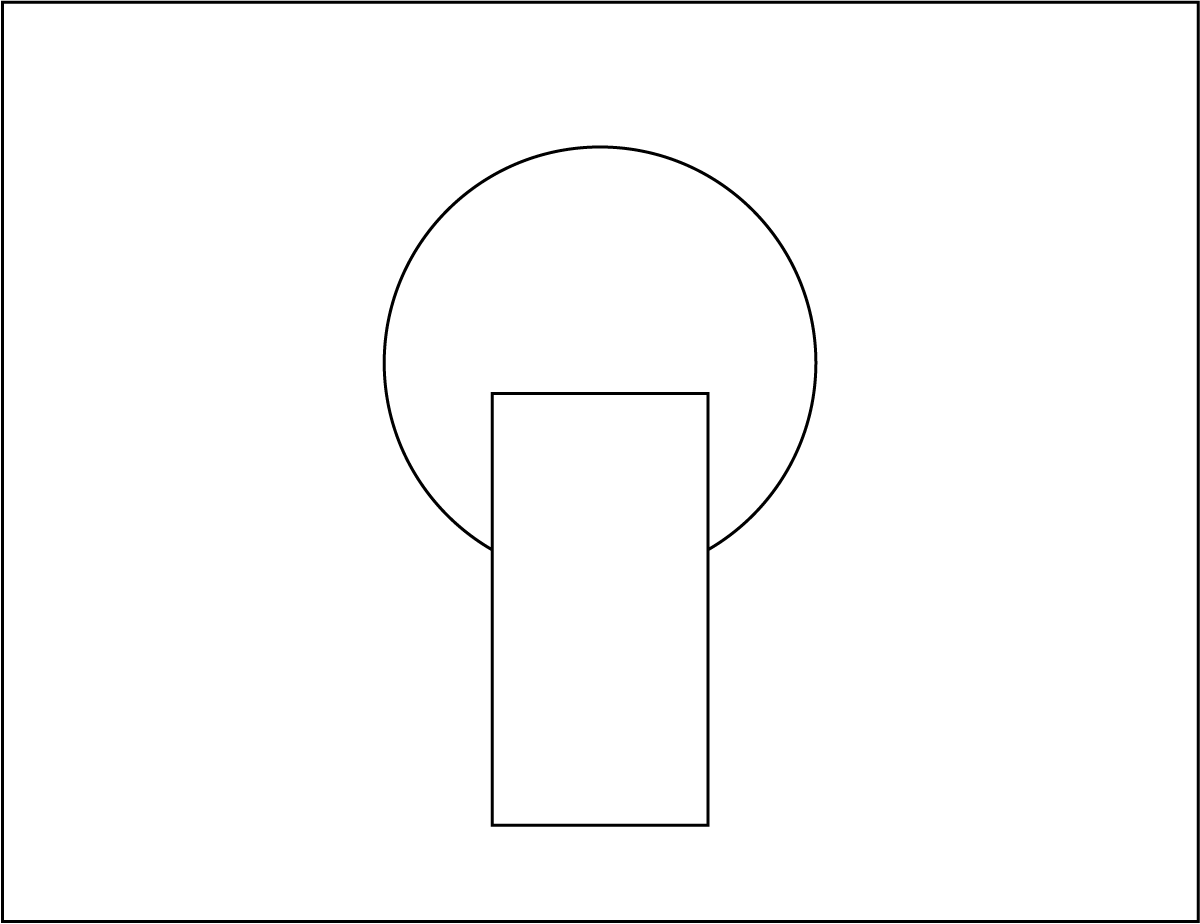
Moving an anchor point
▷ Click on the Direct Selection Tool (second from top) or A.
▷ Then click on the bottom left corner of the rectangle; in the “X window” at the top add “-10” by typing this after the value (see the diagram here).
▷ Do the same bottom right with “+10”. You have moved the bottom corners outwards.

Do not confuse the Selection Tool V (the top one) with the Direct Selection Tool A (next down).
Making a corner rounded
▷ Select the trapeze-shaped object with the Selection Tool V.
▷ Then, once selected, click on the Direct Selection Tool A, and see the little circles on the inside corners.
▷ Drag one of the little circles inwards — note that the corners become rounded.
▷ Undo the rounded corners ⌘Z.
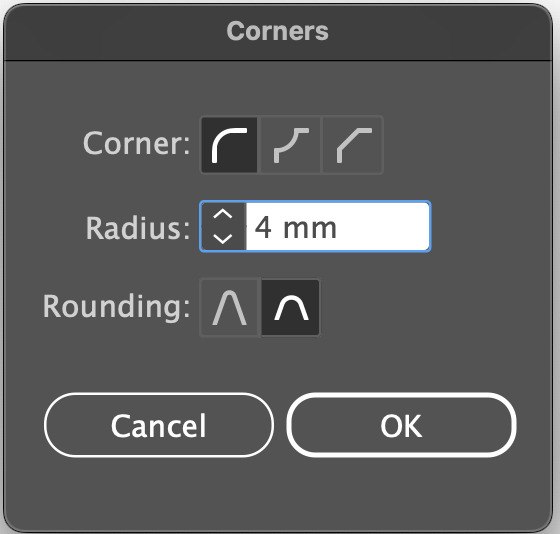
▷ Double-click on the bottom left corner circle and a Corners window appears. Define radius at 4mm. Do the same on the right.
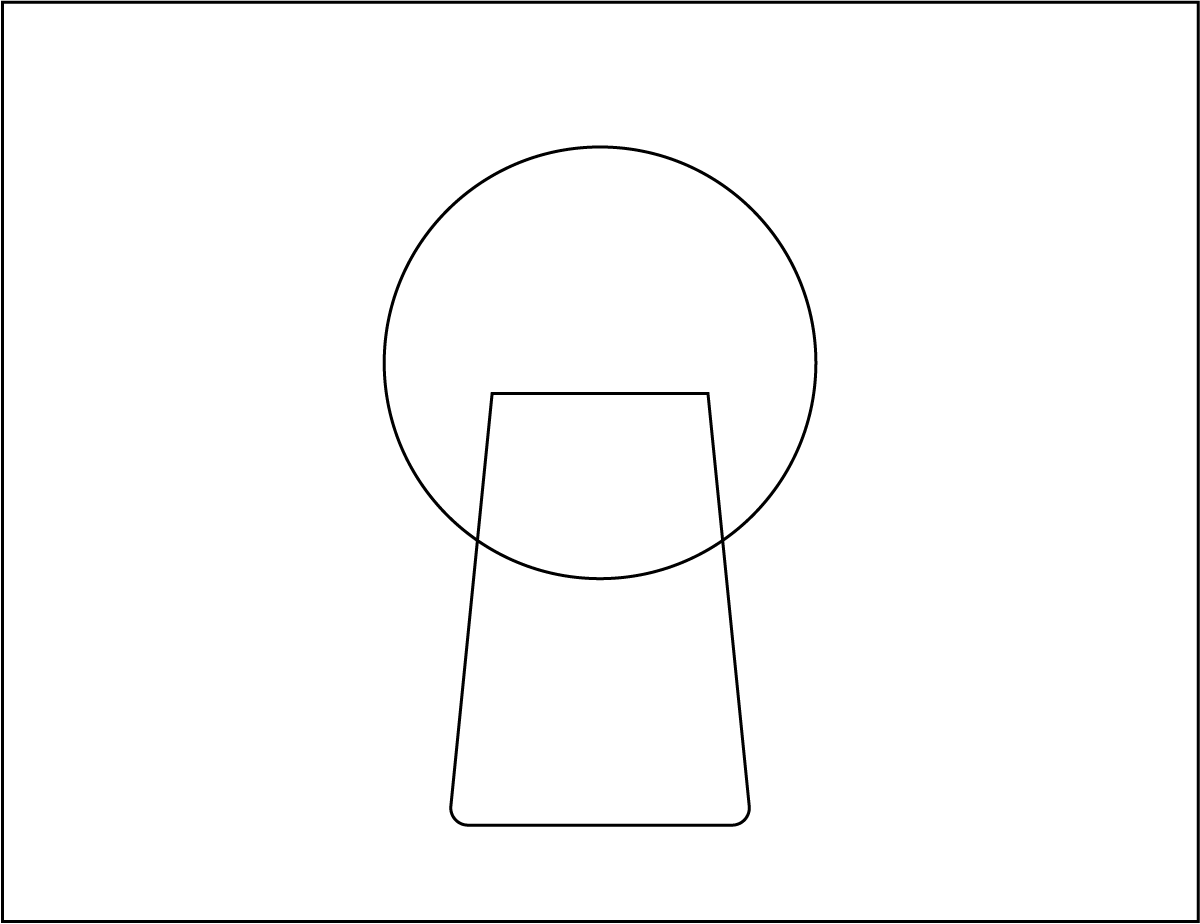
(If you filled the shape with dark grey, you have made a keyhole — but do not do this right now.)
Separating elements
▷ Get the Pathfinder Panel with » Windows » Pathfinder, and place this panel in your Panels Workspace.
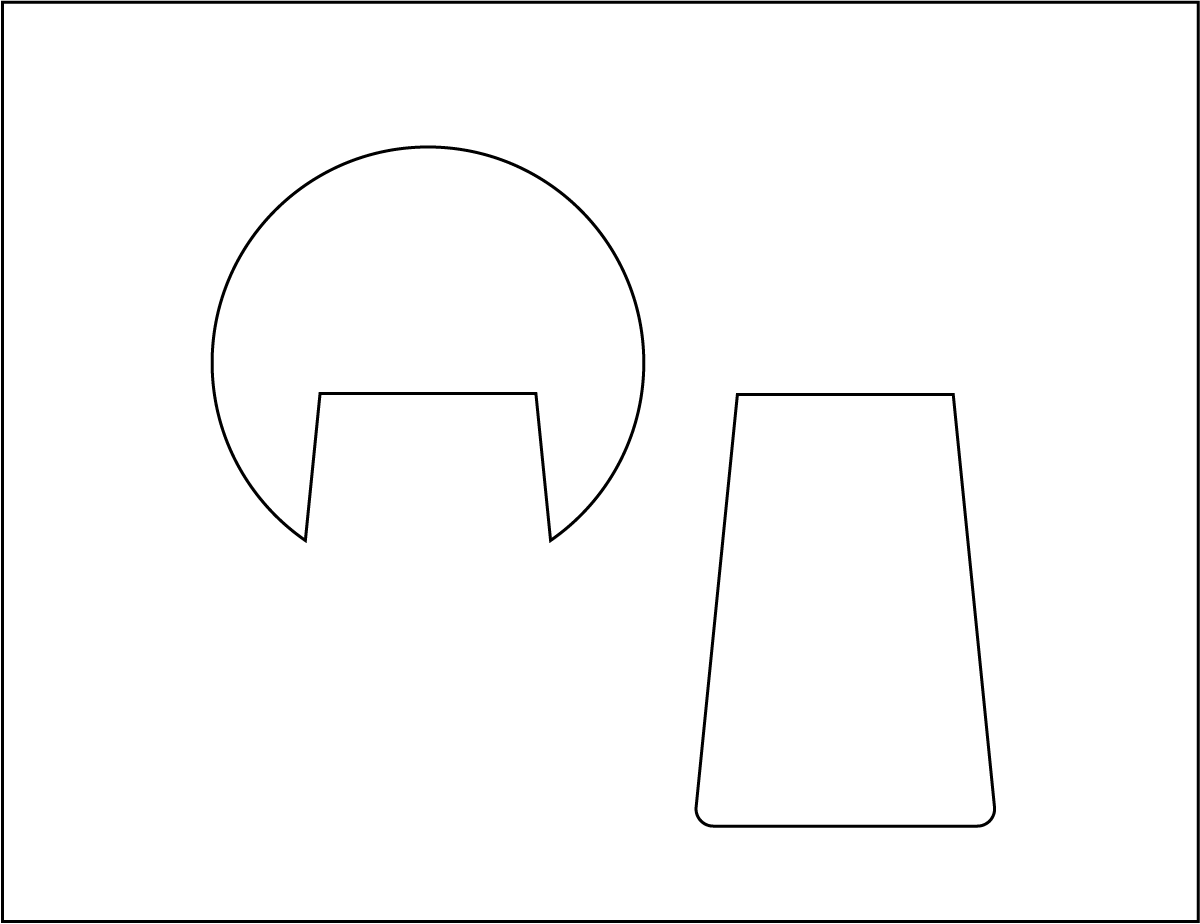
▷ Select both objects, then from the Pathfinder Panel click on the Divide icon (bottom left — looks like two intersecting squares).
▷ Then ungroup (right click then or go or⇧⌘G).
▷ Select (click on) each of the three elements to confirm to yourself that they have been separated.
Combining elements
▷ To recombine the two lower elements (the trapezium), select both the bottom two elements (i.e. not the circle).
▷ Then from the Pathfinder Panel click on the Unite icon (first icon two squares), and the trapezium is reunited.
▷ Drag the two shapes apart to satisfy yourself that you have succeeded in both dividing and combining shapes.
Note that combining, separating or subtracting objects can be done “more efficiently” with the Shape Builder Tool, but this is not intuitive so it is better to use Pathfinder elements unless you do this very often.
2. Editing texts, and more shapes
In Illustrator you can vectorise ("create outlines" of) texts, so that they become shapes that you can maniplate.
▷ Create a new Print A4 landscape document.
Making individual characters into vector shapes
▷ Write the text “Hello!” using the Text Tool T.
(Note that when you have text selected with the Text Tool, you conveniently have access to the Caracter Panel and Paragraph Panel from the Options Bar.)
▷ Make the font Lato Black, in colour blue, and large enough to fill about half the document width.
▷ Select the text and convert to vectors by going or ⇧⌘O
▷ Right-click and go Ungroup or go , and each letter is a separate vector shape.

Manipulating individual characters
▷ Select all ⌘A and press D for default fill and outline, and the texts become the default white fill with black strokes.
▷ Select just the “H”, and move the cursor to just outside the corner of the “H” until you see a curved arrow, and then rotate the “H” slightly.
▷ With the “H” selected, press the Direct Selection Tool, and drag one of the small inside corner circles slightly inward — and the corners become curved.
▷ With the Direct Selection Tool still selected, hold down shift and click on each of the four top corners of the two Ls; drag these corners a little upwards to elongate these characters.
▷ Have each character filled with a different shade of green or blue.
▷ Note that the exclamation mark is considered one object. Separate the dot, using Divide from the Pathfinder Panel, as described above.
▷ Make the dot red.
▷ Select all, and remove the outline — i.e. make the stroke transparent.

Adding anchor points (to make a speech bubble)
▷ Create an orange rectangle (with the Rectangle Tool obviously) to cover all the writing.
▷ Move the rectangle to the back by selecting it, then go .
▷ Let’s make the rectangle into a speech box: Click on the Add Anchor Point Tool + (looks like a pen plus a plus sign and if you cannot find it press the plus on your keyboard and it will show) and, by clicking, make three points quite close together along the bottom of the rectangle near the right corner.
▷ Choose the Direct Selection Tool and drag the middle point downwards and under the first point as shown in the diagram here.
▷ If you want the vertical part of the speech mark to be perfectly vertical: with the Direct Selection Tool, select the left corner and the bottom of the speech mark, and click on the appropriate horizontal align icon from the Control Panel.
▷ Make all the characters white, if you have not done so already.


3. Converting a pixel shape to a vector
It happens quite often that you want to work with an existing shape which exists only as a pixel image (like a PNG file). To manipulate this in Illustrator you first need to convert this shape into a vector. Reiterating: pixel images are images made up of little dots called pixels — a typical digital photo for example; vector images are shapes that are mathematically defined, hence infinitely scalable — a typical logo shape for example.
▷ Download the class material from qoolcat.com/down/illustrator.zip.
▷ Create a new A4 landscape document in Illustrator.
Convert a shape to a vector
▷ Go ⌘D and place the facebook-logo.png image on one side of the page.
▷ To convert this image file to a vector graphic, select it and go , and the image file has been vectorised. (If you want more control, you can use the Image Trace panel instead.)
▷ But unbeknown, some unwanted “noise” is sometimes included, so here is a trick…
—▷ with the image selected go , (or right-click and )
—▷ then with the Selection Tool selected, click once outside the image then again re-select
—▷ drag the image to the other half of the page
—▷ then delete the outlines that were left behind.
▷ Change the fill colour from black to dark orange.

More practice with shapes (make the Facebook logo pregnant)
▷ Select the image and, using the Pen Tool P, add a point on the edge of the “f” at the position of the black arrowhead as shown above.
▷ With the Direct Selection Tool A selected, drag this point a little to the right.
▷ To make this point into a curved line, select the Anchor Point Tool ⇧C (underneath the Pen Tool), click on the new point, and drag it either upwards or downwards until the result looks like the image here.

4. Pathfinder
Here we already have some revision: the Pathrfiner Panel is useful for dividing and for combining shapes
▷ Create three circles and arrange them as per the diagram here.
▷ Open the Pathfinder Panel (If you cannot find this panel, go ).
▷ Select all three circles, from the Pathfinder panel, click Divide.
▷ Ungroup, and fill some segments with a different colour, as per the top diagram here.

▷ Create two circles as per the arrangement here.
▷ Select both circles, and from the Pathfinder Panel, press Minus Front, and you get the result shown on the right.

5. Pen Tool
The Pen Tool, where you draw (trace) a shape, is used in Photoshop, InDesign and Illustrator. In Photoshop it is used as the "selection tool of last resort": if all else fails in attempting to select something, you then trace the selection with the Pen Tool. It sometimes takes a while to learn this tool, but once you get the hang of it and practice a little, it is quite easy.
Learn the Pen Tool
An efficient way to learn the Pen tool is to follow a video.
☐ Learn the basic Pen Tool technique by watching this video (9’52”).
Practice the Pen Tool
▷ Sketch a “lob-sided” (one side bigger than the other) heart shape on a piece of paper.
▷ Photograph this heart with your smartphone or computer camera (on a MacBook you can use the Photo Booth application to photograph).
▷ Place this photo as a layer in Illustrator.
▷ Created a layer above, and trace the heart using the Pen Tool.
▷ The rest should be obvious: recreate the illustration shown here.

6. Exporting your artwork
Most people do not have Illustrator and, in any event, your final Illustrator sketch will probably be used somewhere — so you need to export it. PNG is an efficient pixel format for shapes like logos and diagrams but if possible use the SVG format which is a vector (so small file size and infinite resolution).
Format export examples:
- for use in a PowerPoint or Word document (Word after 2019 version), use SVG
- Apple Pages and Keynote do not accept SVG, so use PNG with an image size of at least 100 px per cm
- for the web generally use PNG, unless the web server accepts SVG
- for sending as an email attachment or inserting in social media use PNG
- for InDesign just copy-paste directly from Illustrator.
Let’s assume that you want to export the “LOVE sketch” that you created above for a website with a width of 1200px.
▷ Select the whole “LOVE sketch”.
▷ Go .
▷ In the window that opens, choose an Export to location, and have Scale as 1200px (actually type "1200px" into the Scale field) and Format at PNG.
▷ Click on Export Asset.
▷ Exporting as an SVG has the advantage that you are exporting a vector (PNG is a pixel format), which is so to say cleaner and has an infinite resolution — but some applications do not accept vectors as input.
(If you go , then the sketch including the whole artboard exports; the command offers a lot of options that you are unlikely to ever need.)
7. Text to vector graphics (optional)
New in Illustrator 2024 is functionality similar to Generative Fill in Photoshop.
In March 2025 I removed this section because Generatif Fill for Illustrator has been "demoted" to a beta version and is not behaving the same as initially.
But try the following:
▷ Create a new Illustrator document.
▷ Add a large rectangle.
▷ With the large rectangle selected: in the floating window, in the Generate Vectors field, type "camping tent in snow" then click on Generate— the rest is obvious.